Happy Easter to everyone!! I hope where you are it is a sunny as it is here, and boy am I finally glad to see some sun. Of course that also means I can see where all the lovely "deposits" that Finn made over the winter. Ah well, at least I have warm weather for that chore LOL!!. I'm also anxious to get my fingers dirty in my two small garden patches, maybe I'll take a trip to my favourite garden store next week. Well that's all for now, and again Happy Easter to all.
Friday, April 3, 2015
Monday, April 21, 2014
Free Shipping and Retired Lists
STAMPIN' Up! is offering FREE SHIPPING on EVERYTHING!!!
Clearance Rack
My Digital Studio Print Items
Personalized Stamps & Circle Monogram Stamps
Regular Catalogue Merchandise
New Arrivals
RETIRING ITEMS!!!
Retiring Lists - WHILE SUPPLIES LAST!!! So take advantage of free shipping this week, click the shop online button (over on the right), then click on "promotions" and you will see each item with it's description.
![]() |
Tuesday, December 17, 2013
Dec 17 Weekly Deals
Here are the weekly deals for this week, just click on the header below and you will be magically whisked away to my online store!!
|
Wednesday, December 11, 2013
Just in time for.....
It's that time of year again......yup Clearance Rack Blitz!! Bet you thought I meant Christmas, well since it is that time as well why not treat yourself to a little something for your crafty creations, or maybe you have someone else in mind who deserves something nice. Either way be sure to click on my online shopping button (over there on the right) and see what goodies Stampin' Up is offering. Happy Shopping!!
Wednesday, August 14, 2013
Get a Jump Start on the Holidays...
SINGLE STAMPS -- NEW HOLIDAY COLLECTION!
|
Thursday, August 1, 2013
Holiday Catalogue and New Product!!
I have posted the new Holiday Catalogue which goes live to all of you today!! (click the Catalogue tab above)
Watch this quick video and see them in action!
Happy Stampin'
Deb
Introducing "Thinlits"
Now you can make those fun flip flop, or swing cards which have always been a bit finicky to create, with the new Thinlits Card Dies they cut and score in one easy step.Watch this quick video and see them in action!
| Item | Description | Price |
| 133479 | Label Card Thinlits Die | $40.95 |
| 133480 | Circle Card Thinlits Die | $40.95 |
With the number of dies you're getting, plus the die that creates the card itself, the price is a great value-especially to create an interactive card!
- Promote mass production of these impressive "flip" cards. They would make great announcements, invitations, or Christmas cards. You can even help your customers select all the supplies they will need to create their cards.
- These Thinlits Card Dies will be available at least through the 2013-2014 catalog year, so you can feel confident investing in them and promoting them for many months to come.
- The main shape in the cards (circle and label) can work with a lot of our stamp images so you can create tons of different kinds of cards using many different stamp sets. Here are just a few suggestions to get you started:
Label Card Thinlits Die (item 133479):
- Happy Day Stamp Set (item 130294 W item 130297 C)
Circle Card Thinlits Die (item 133480):
- Worth the Wait Stamp (item 131094 W)
- Five-Way Flower Stamp (item 131088 W)
Both card dies pair well with:
- Oh, Hello Stamp Set (item 131931 W item 130733 C)
- Yippee-Skippee! Stamp Set (item 131341 W item 131344 C)
- Really Good Greetings Stamp Set (item 130330 W item 130333 C)
- Regarding Dahlias Stamp Set (item 130324 W item 130327 C)
- These dies also work well with our new magnetic platform (item 130658) so you can place the dies exactly where you want them!
Happy Stampin'
Deb
Tuesday, May 14, 2013
Finally.....a scrapbook page
So those of you who stop by my blog know, or at least have figured out, that I am basically a card maker. Well I am also a self-confessed paper hoarder, be it real or digital. Years ago when I first heard of scrapbooking I, and my eldest daughter (she was still living at home then), went and bought some basic tools to start scrapbooking. We were all gung-ho and truth be told my daughter did make a couple of pages. I on the other hand, think too much (as a friend once told me)and therefore have several pages in my head, pieces cut out, planned, pictures scanned and/or printed all ready to be made into the most wonderful pages!! LOL,
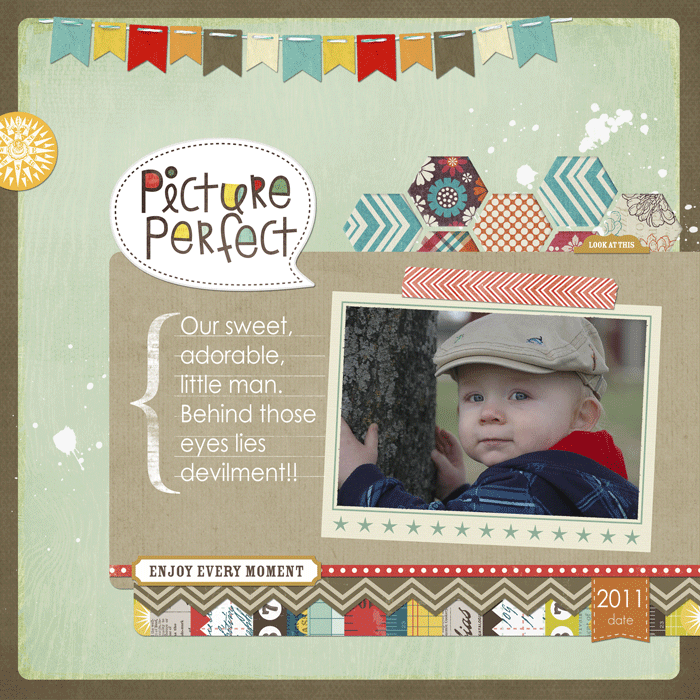
A few weeks ago I had happened upon a free kit and tutorial from Jessica Sprague which she offered for the USA "Arbor Day" holiday. This is the page I made with that kit. It is a picture of our little grandson I took while on his first visit to a Pumpkin Patch, and if you all are patient I will get around to putting together a page which actually shows some pumpkins!
Recently it was iNSD (InterNational Scrapbooking Day) and I participated in a G+ hangout tutorial with some lovely ladies. It was for beginner digital scrapbookers. I learned quite a few new, well actually almost all of what I learned was new, things and made my 2nd digital scrapbook page. I'm not quite finished with it yet, I need to put some more "elements" on the page before I'm totally satisfied with it. So stay tuned.
On another note, I'm not sure if there are any of you out there really following me, but if you are I will be out of commission for a few weeks, as I am having carpel surgery next week. Luckily it's on my left wrist, so I may be able to mouse around, ya' never know!!!
A few weeks ago I had happened upon a free kit and tutorial from Jessica Sprague which she offered for the USA "Arbor Day" holiday. This is the page I made with that kit. It is a picture of our little grandson I took while on his first visit to a Pumpkin Patch, and if you all are patient I will get around to putting together a page which actually shows some pumpkins!
Recently it was iNSD (InterNational Scrapbooking Day) and I participated in a G+ hangout tutorial with some lovely ladies. It was for beginner digital scrapbookers. I learned quite a few new, well actually almost all of what I learned was new, things and made my 2nd digital scrapbook page. I'm not quite finished with it yet, I need to put some more "elements" on the page before I'm totally satisfied with it. So stay tuned.
On another note, I'm not sure if there are any of you out there really following me, but if you are I will be out of commission for a few weeks, as I am having carpel surgery next week. Luckily it's on my left wrist, so I may be able to mouse around, ya' never know!!!
Thursday, April 4, 2013
Stampin' Up! News
So many things going on around Stampin' Up! lately that every time I turn around something new is announced. I thought I'd let you in on a couple of things.
Happy Stampin'
FREE SHIPPING!!
We are offering FREE shipping on EVERYTHNG April 6 - 8 (excluding expeditied orders)! That's right, no minimums or limits and all order types qualify. So if you've been putting off buying that "Special" stamp set...now is the time. As always utilize my "shop" button in the right side bar, or give me a call I'd love to talk to you and help you with any questions you may have.COLOUR REFRESH
Stampin' Up! is doing a little "freshening" up of their colour families. This means the retiring colours will be going on the "retired" list coming out soon in anticipation of the new 2013-2014 annual catalogue (May 31, 2013). On the chart below you will notice 10 new colours (most of which are returning In Colours from previous years), welcoming back some of your favourites, moving some colours to new families and introducing one brand-new colour. So peruse the chart carefully because beginning today April 4, 2013, all retiring/discontinued colour products (i.e. ink, paper, ribbon, accessories, etc.) will be available only while supplies last, and with free shipping, see above, now is the time to stock up on all your favourites before they are gone forever!!!
On a sad note.....
WATERCOLOUR PENCILS & CRAYONS are being discontinued.
The Watercolour Pencils and Crayons Brights collection are no longer available. The Crayons in the Subtles, Neutrals and Regals collections are available while supplies last.
Happy Stampin'
Deb
Saturday, February 9, 2013
Catch Up
Well my sister brought it to my attention that my blog seems a little stalled, it's probably more like it's me that's stalled LOL, so in a quick effort to catch up here are some of the cards I have been working on since last we visited.
![]() |
| This is CASE's from Melissa Davies over at RubberFUNatics I just love her work, check out her blog. |
This is also CASE'd, I can't remember who from (if it's yours let me know, so I can give you proper credit).This is my version but changed it up for my class. The ladies used Silver Glimmer paper strips for the lattice, which is stunning as well, and some used a Real Red piece for backing which gave it another super look. I decided the pearls were not necessary with the glimmer paper. I wish I had taken pictures of them, they really were sparkly. Maybe I'll do up another one and post it someday.
One last Christmas card.
This one I did for a swap with a group of fabulous girls I know. I think it became my favourite from my 2012 Christmas selection (I think I had 14 different cards in all).
Well after all that snow the last 2 days, it's nice and sunny so I will go dig out some of the other cards and take some pictures and post them for you.
Happy Stampin'
Deb
Monday, July 9, 2012
It's been awhile, but I'm back
Well, I've been MIA for a while, but I'm back full strength now and it's smooth sailing ahead. Well until the next wave in the lake. Our DD and family moved back to our neck of the woods and are now only 5 mins. away, so I see a lot of our little "bug". That's where some of my time went, but it's time well spent and the bonus is I sleep very well after his visits LOL.
I would like to show you the projects from the last couple of my WOW Wednesday classes, so I will post April's now and over the next few days catch up with the rest. So keep popping back in, you might see something you like!
I have been wanting to make these adorable little birdhouses since I first saw them in our Stampin' Success magazine (exclusive to demo's sorry!) last year.
This pic does not do it justice, it really is does not list to the left, it's just resting on a tumbled tile I made last year for DH for Father's Day. There is little "blingies" in the flowers, and the Daffodil Delight is so bright and cheery and really sets off the Certainly Celery DSP.
To download the template for this adorable birdhouse click here.
Here are 2 cards we also made. This is the Stained Glass technique and is just so pretty and feminine.
And the Spotlight technique, I also showed the ladies how to do the brayered embossing folder technique for the background on this one.
I have a little bookcase set up in My Creative Space, where I hold my classes, and use the top shelf to display some special items I have created. I try to change this out frequently but lately it has been neglected. Here is a pic as it was a few months ago. I hope to have some new items to display for next class.
Thanks Kirsteen for setting me on another path of creativeness.
The little yellow matchbox is still full of those little flowers I punched for the framed art, and it seems someone has absconded with the little JellyBellies from the pink box LOL.
As always, please leave a comment or contact me if you have any questions.
Happy Stampin'
Deb
Tuesday, April 3, 2012
Just one of those days
So yesterday was a "I should have stayed in bed day". It started off great, I was off to see my grandson get his first haircut, DD had chosen such a cute place that specializes in kids cuts. Well I was amazed at the set-up, as I'd never had these types of places when my kids were small, of course I made sure I took my camera to take lots of pics, go to turn it on........guess what..........battery dead. Now, I have 2 batteries to eliminate this problem (can you tell I've done this before LOL). I had put in a fresh one the night before (I thought), while I charged up the dead one. Luckily I had my cell phone charging in the car (sense a theme here....). Well we did get lots of pics, even the teary ones, he didn't like getting his bangs cut.
Well haircut done, off to the post office to mail off an ATC swap that a group of us have every month. Oh shoot, it's the post lady that always gives me grief about something to do with my package. I nicely asked her how much postage I needed for this particular package, she answered $1.27 really quickly and before I could say anything she slapped on the postage!!!!! I already had stamps out and she could see that, I only wanted to know how much I needed. Anyway I used my stamps for the return postage and sealed up the envelope. It didn't seal, faulty glue. Nice post lady, watched me struggling with the flap, knew it wasn't sticking, but I had to ask her for some tape, she hands me a glue stick which I knew wasn't going to work now that the flap was all damp. Then when I showed here it still wasn't sticking she did an eye roll worthy of "Stephanie Plum" and said "here I've got some tape", all the time never a flicker of a smile or any emotion at all. This is not the first time I have dealt with her, the other post lady that works there is very nice, but next time I see this nice post lady I'll go to another post office.
Then, everyone on the road seemed to be just driving crazy - one guy making a left hand turn decided he was out to far and backed up, into OUR lane!!!! There was a police car behind me, but he was obviously going off shift as he did nothing except swerve like the rest of us to miss the left turning idiot. It just seemed that a lot of little things kept going wrong. Just one of those days!
Oh enough ranting on to some cards.
The technique for my WOW Wednesday class this month was Bleaching. We all had so much fun trying out different colours of scrap paper to see what colour the bleach would turn them, some were really spectacular and others didn't seem to do much. Oh and don't look too close, you'll see how I went out of the edges on the boat. Even embossing can't keep me in the lines. LOL
We used the bleaching a stamped image technique for this masuclilne card.
The recipe:
Stamp - Sail Away
Card stock - Always Artichoke & Sahara Sand
Designer paper - Well Worn & Paisley Petals
Inks - Always Artichoke, Crumb Cake & Black Stazon
and of course household bleach.
This is a" Z fold" card with the image added to a "gate type" front piece.
This next one used the bleach as a stamp pad technique. I have used this particular design many times on cards, it seems to be my go to when my mojo has got up and left. It is simple and now I wish I had used a punched border on the bottom of the three sections. It still is a very pretty card and everyone seemed to like it.
The recipe:
Stamp - Fresh Vintage & Elementary Elegance
Card stock - Real Red, Crumb Cake, Whisper White
Designer paper - Elementary Elegance
Inks - Real Red & Crumb Cake
Extras - Vintage Wall paper embossing folder, Oval punches, basic pearls & Big Shot
Thanks for looking,
Hugs,
Deb
Well haircut done, off to the post office to mail off an ATC swap that a group of us have every month. Oh shoot, it's the post lady that always gives me grief about something to do with my package. I nicely asked her how much postage I needed for this particular package, she answered $1.27 really quickly and before I could say anything she slapped on the postage!!!!! I already had stamps out and she could see that, I only wanted to know how much I needed. Anyway I used my stamps for the return postage and sealed up the envelope. It didn't seal, faulty glue. Nice post lady, watched me struggling with the flap, knew it wasn't sticking, but I had to ask her for some tape, she hands me a glue stick which I knew wasn't going to work now that the flap was all damp. Then when I showed here it still wasn't sticking she did an eye roll worthy of "Stephanie Plum" and said "here I've got some tape", all the time never a flicker of a smile or any emotion at all. This is not the first time I have dealt with her, the other post lady that works there is very nice, but next time I see this nice post lady I'll go to another post office.
Then, everyone on the road seemed to be just driving crazy - one guy making a left hand turn decided he was out to far and backed up, into OUR lane!!!! There was a police car behind me, but he was obviously going off shift as he did nothing except swerve like the rest of us to miss the left turning idiot. It just seemed that a lot of little things kept going wrong. Just one of those days!
Oh enough ranting on to some cards.
The technique for my WOW Wednesday class this month was Bleaching. We all had so much fun trying out different colours of scrap paper to see what colour the bleach would turn them, some were really spectacular and others didn't seem to do much. Oh and don't look too close, you'll see how I went out of the edges on the boat. Even embossing can't keep me in the lines. LOL
We used the bleaching a stamped image technique for this masuclilne card.
The recipe:
Stamp - Sail Away
Card stock - Always Artichoke & Sahara Sand
Designer paper - Well Worn & Paisley Petals
Inks - Always Artichoke, Crumb Cake & Black Stazon
and of course household bleach.
This is a" Z fold" card with the image added to a "gate type" front piece.
This next one used the bleach as a stamp pad technique. I have used this particular design many times on cards, it seems to be my go to when my mojo has got up and left. It is simple and now I wish I had used a punched border on the bottom of the three sections. It still is a very pretty card and everyone seemed to like it.
The recipe:
Stamp - Fresh Vintage & Elementary Elegance
Card stock - Real Red, Crumb Cake, Whisper White
Designer paper - Elementary Elegance
Inks - Real Red & Crumb Cake
Extras - Vintage Wall paper embossing folder, Oval punches, basic pearls & Big Shot
Thanks for looking,
Hugs,
Deb
Sunday, March 11, 2012
Yeah...the sun is finally shining!
Well it's finally looking and feeling, like spring. I have the windows open and it's even sounding like spring, love to hear the birds....makes me happy.What a lovely day for the St. Patrick's Day parade, that's where most of my family is today. I decided not to go as I still have some prep work to do for my WOW Wednesday class. It was so nice to have my "green" mojo kick in and I finished that St. Patrick's Day card and got them mailed away, I used the new lovely Everyday Elegance paper and some of the Lucky Limeade ribbon from Stampin' Up. (both of which you can still get free from the Sale-A-Bration catalogue click on the catalogues tab to see details) To make the shamrock I punched 3 hearts, using the small heart punch, out of some of the silver glimmer paper which I first coloured green, and then hand cut the little stem. I mounted it on some ovals in Whisper white and Lucky Limeade then popped that up on a layer of Whisper white I ran through the dotted embossing folder.
It seems so simple now, but this was my 4th design for this card.
While I had that mojo captive I whipped up a belated Birthday card for my sister (her birthday was in January, bad me, but she still loves me anyway). Maybe I should start working on her next birthday card now! LOL. I used a base of Perfect Plum and this was a stretch for me I almost always start with a white base, ran a layer of Whisper White through the dotted embossing folder, sponged the edges lightly with Wisteria Wonder. Using the Greenhouse Garden set (which is a two-step stamp) I stamped the large flower twice using Perfect Plum and Concord Crush, ran some Old Olive through the Little Leaves sizzlet and some scraps were used in the Beautiful Wings sizzlet for the butterfly. Some pearls for bling and some ribbon from my stash and Voila!! done.
Now what took me so long?
Thanks for stopping by and check back in a few days to see what we did on WOW Wednesday.
Hugs,
Deb
Sunday, March 4, 2012
It's not easy being green
This post is kinda out of desperation.....my St. Patrick's Day mojo has finally left the house! I have been trying to come up with a simple but not too simple design for mass production. I send out 12 cards to family and they look forward to them each year, so it is a challenge to out do my previous year card. Anyway since I have discarded 3 different designs so far I'm hoping that this 4th one is the keeper. I guess it better be time is a-runnin' out.
So for today's cards one is for a birthday and one is a pick-me-up for someone special who is going through a tough time right now. I do have to give Kari Metzger my sincere thanks for the idea of using SU Framelits in 3D. I don't have the Framelits so I used my nesties, which look very much like the Framelits, anyway you'll get the idea when you see them.
I had a devil of a time photographing these. It's very hard to see the 3d effect of the frames in these pics, so I took a few close up shots. Here's one.
Well now, off to finish those "green" cards LOL!!
Hugs,
Deb
So for today's cards one is for a birthday and one is a pick-me-up for someone special who is going through a tough time right now. I do have to give Kari Metzger my sincere thanks for the idea of using SU Framelits in 3D. I don't have the Framelits so I used my nesties, which look very much like the Framelits, anyway you'll get the idea when you see them.
I had a devil of a time photographing these. It's very hard to see the 3d effect of the frames in these pics, so I took a few close up shots. Here's one.
Well now, off to finish those "green" cards LOL!!
Hugs,
Deb
Tuesday, February 28, 2012
Where does the time go..
Oh my goodness, it has been a while since I last posted. Please forgive me, but I have been having too much fun organizing my new area, and have been super busy making cards and planning my new WOW Wednesday classes. On the 2nd Wednesday of every month some super ladies join me for WOW Wednesdays, we learn some new techniques and make a project or two. Last month I had the ladies recreate one of my Christmas cards to learn the reverse masking technique.We changed it up so they could use it for any occasion they wished. Here is my Christmas example. Quite a few of the ladies said they would use this for a masculine card, and I do agree, SU's Lovely as a Tree set is so versatile.
Then for the really fun part.....a Valentine shaker card. How cute is this. It is a small 4x4 card and we made an envelope for it as well. Don't you just love those little hearts, we used three different SU tools to make them, the larger heart on the bottom right is a QuicKutz I've had for ages but it seemed to fit right in. I do wish I had used a lighter backing on the shaker part so the glittery hearts showed up better, oooh well next time.
If you want any further info about these cards, leave me a comment and I'll get back to you.
Well I have another few cards ready to post for another day, so stay tuned.
Hugs
Deb
Then for the really fun part.....a Valentine shaker card. How cute is this. It is a small 4x4 card and we made an envelope for it as well. Don't you just love those little hearts, we used three different SU tools to make them, the larger heart on the bottom right is a QuicKutz I've had for ages but it seemed to fit right in. I do wish I had used a lighter backing on the shaker part so the glittery hearts showed up better, oooh well next time.
If you want any further info about these cards, leave me a comment and I'll get back to you.
Well I have another few cards ready to post for another day, so stay tuned.
Hugs
Deb
Saturday, January 28, 2012
New Craft Space
Two trips to Ikea, one large delivery, three days of assembly (read sore feet and backs) and organization (although I can guarantee I'll fiddle with the organization forever) It's finally finished!!! I just love it, and don't think I can thank DH enough for all his help, not to mention his patience while I made up my mind what and where I wanted things. So here is the big reveal.......
This is the space empty...
This is where everything went to....
The delivery...
This is where my old desk was with the bicycle picture on the wall (see previous post for reference). I will be painting my sewing table white to match the rest of the furniture. It holds my scanner and Silhouette machine right now. You can also see part of DH's surprise for me there in the middle 

Here is the empty space (from above pic) filled. And that lovely new desk can raise and lower on both ends and has a light box built in too! DH also surprised me with those colourful puzzle mats, to use as another place to pin up "stuff" which I call art LOL.
The view looking out from the above pic.
And the last pic is of the whole space or as much as I could fit in the frame.
Oooh goodness, it looks like my little grandson left some stickers up for me, hehe I didn't see them 'til now.
I truly look forward to many happy hours of crafting here, and I am always happy to have friends join me, the more the merrier and if anyone wants to know more about the furniture or what I keep where let me know and I'll be happy to share with you.
Hugs,
Deb
Monday, January 16, 2012
A Card and a mess
First the Card....
Well it's been a few days since my last post, but you will forgive me when I tell you why. My darling husband said to me "What would you need (I heard "want") to get your "stuff" (I may have taken offence to that word hehehe) organized, and tidied up?? Now understand that my craft space is in our finished basement, where we do most of our entertaining, and it seems when I start a project it grows and grows and grows until it seems I have something on every flat surface in the whole Rec room. DH says give me a flat surface and I'll cover it!! He is right, but then I always set things to right.........eventually. So to make a short story long, I have been carting up all my "stuff" (can you tell that still bugs me!) into some lovely IKEA containers, and the large units should arrive sometime before Saturday. I am so excited, it's just like waiting for the UPS girl to deliver my orders. In amongst all this upheaval I had to make DD her birthday card, and I have also been working on an ATC swap, but that is on hold 'til the weekend. So here are some pics, and don't forget to stop back to see the final reveal.
And now the mess!!
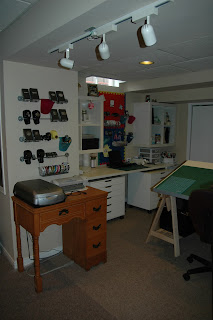
The file cabinet on the right is where I keep my 8 1/2 x 11 card stock, along with our business and personal files. I have also taken over 2 1/2 shelves in the bookcase, which I will be returning to the Rec room. There is also a nice big (well huge actually) bulletin board to be put up. Soon we will be able to use the exercise station, which is that large circular monstrosity, actually I like it because it has doors to keep it neat.
This is the built in bookcase, which holds my 12" papers on the right, and the bottom 2 shelves in the middle have taken over too. My hope is to clear it all off and paint it white like I wanted to when it was built 12 years ago, no hurry!!!
This is my main work area, there are bright halogen lights overhead. To the back left are all my supplies, ink, embellies, more punches etc. This area will be one of the three big changes.
Well enough for today, I will return with more soon.
Hugs,
Deb
Subscribe to:
Posts (Atom)